7 Worst Mistakes People Make In Lighting Installation
November 16, 2019
What Are The Best Kept Secrets About Choosing The Right Handyman?
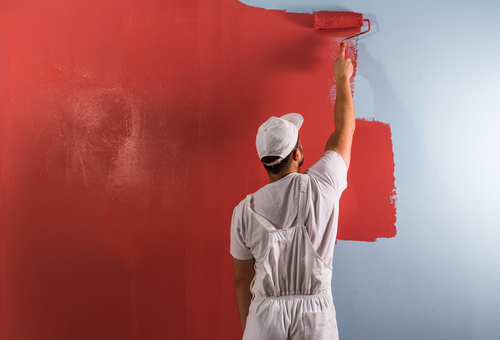
November 16, 2019A Comprehensive Look At The Tips And Strategies To Solving Harline Cracks

Did you know that cracks on a wall are completely inevitable in any given home? As a matter of fact, time alone produces certain awful hairline cracks that will compel you to fix them permanently. When concrete floors and walls are poured, the water that’s utilized in mixing sand and cement tend to evaporate, curing the mixture into a certain monolithic slab. Usually, the entire process begins with a very small amount of shrinkage that continues for a little while to ultimately result in some horrible cracks. Once these concrete walls and floors are painted, any cracks that still exists will stand out conspicuously. Thus, to prevent more cracks from developing and letting moisture in, it’s quite impeccable to fill the cracks and get done with the issue once and for all.
What causes flaking or paint cracking?
Well, there are a number of situations that lead to paint cracking or flaking. Here are some of the situations that might ultimately result in flaking:
– Too thin oil spread during the application
– Use of low quality paint, finally resulting in inadequate flexibility and adhesion
– Application of oil-based paint over the latex paint
– Poor and inadequate surface preparation, more so when the paint is applied to a bare wood without adequate priming
– As a result of environmental conditions, certain paints dry too fast resulting in flaking
– Paint becoming too brittle with age, thus failing to contract and expand with humidity and temperature changes
– Extreme cracking, sometimes referred to as ”alligatoring” which results when either a second or third coat of paint is applied before the previous coat completely dries. This condition also happens whenever the undercoat is entirely incompatible with the finish coat.
Types of hairline cracks
There are different types of hairline cracks. Usually, the pattern of the crack tells you the main cause of that particular crack. Here are some of the most notorious hairline cracks:
1. Spider cracks
Also known as the Radial cracks, Spider cracks are mostly caused by the impact.
2. Linear cracks
Linear cracks are typically caused by the flexural strain in the walls or floors.
3. Thermal fatigue cracks
This normally results when the gel coat contracts or when it expands. These might happen in a non-directional pattern or in a parallel pattern depending exclusively on the thermal intensity.
4. Form stress reisers
Apparently, Form stress reisers results when either a hole or a bolted on section puts excess strain on a certain area of a boat, where cracks then occur around the hole.
Here are some steps that you need to integrate in a bid to fix hairline cracks in a painted concrete. Follow these steps correctly to get ultimate results.
Step 1.
First and foremost, you have to vacuum the entire length of the crack you’d like to fill. Dirt and dust will find their way into the cracks, and thus will prevent a nice bond with the epoxy. Ensure that there isn’t any more water or moisture in the cracks before filling. Remember, if there is any moisture or water, you must dry it using a hair dryer. And then, let it sit for at least 30 minutes to ensure that there isn’t any more water remaining.
Step 2.
Apply some polyurethane or epoxy to the concrete. It’s highly recommended that you probably choose a high-viscosity two-part epoxy from a local hardware store. Typically, a high viscosity epoxy becomes thinner (like water) than any other type, and will most likely fill the entire crack.
If need be, you can always use any included fine-tipped nozzles to make certain that you reach the deepest parts of the crack with the epoxy. After you’ve applied the epoxy, allow it at least 12 to 24 hours to properly set so you can achieve your ultimate results.
Step 3.
Sand the whole surface of the epoxy-filled crack. Wrap some medium grit sandpaper all around the sand and wooden block in a circular manner along the crack. You have to wrap it, preferably until the surface of the concrete becomes quite smooth and fine to the touch. During this process, dust might find their way into the surface created during sanding. Thus, you have to vacuum away to ensure that the surface is crystal clear before embarking on the following process.
Step 4.
Repaint the concrete, preferably using the same same paint as was used in the previous painting. To make the task faster, plus to prevent any brush strokes, you can incorporate the use of a roller to paint the concrete. You may want to paint a larger area so as to disguise the repair, especially if other sections of the surface have faded away or if your paint is slightly different in color.
Tips to fixing hair line cracks in a textured Sheetrock ceiling:
Sheetrock ceiling, also referred to as a ”drywall’ doesn’t crack very easily. So, when hairline cracks develop in your ceiling, it becomes another cause for concern. Apparently, it signifies certain movements in the framing that could result from some structural issues that must be addressed in its early stages. Here’s how to address the drywall hairline cracks. Take a look:
Step 1.
Prepare the Sheetrock ceiling on all the sides of the crack by scraping the whole surface with a drywall knife so as to remove loose or some chipping papers. If you find that the texture is a bit rough, utilize a knife to flatten it and to remove adhesion of the tape.
Step 2.
Along the walls of the crack, spread a coat of a drywall paper primer if the wall is painted using the gloss paint. Usually, the primer enhances adhesion of the drywall joint compound required for the entire repair.
Step 3.
Cover the cracked area with self-adhesive fiber glass mesh drywall tape. This crafts a very robust repair than use of the paper tape, plus it has better chances of preventing cracks from recurring.
Step 4.
This process entails spreading a coat all-purpose dry wall joint compound over the tape, probably with a 4 inch dry wall knife. And then scrap it rigorously to smooth it and to make it flat as well. Due to the nature of the tape, you might not achieve a completely flat joint when you first scrap it for the first time. However, you need not to worry. You’ll certainly be able to flatten it with your subsequent coats.
Step 5.
It’s quite impeccable to let the mud dry overnight, and then spread the second coat and scrape it with an 8 inch knife. Give enough time for the first coat to properly dry before you apply a third coat. Once it’s completely dry, apply a third coat just the same way with the first one, but this time, use a 10 inch knife this time. By now, your repair should probably be flat. If not, you have to apply another coat to flatten it completely.
Step 6.
After the final finish coat dries perfectly well, texture your repair using the same technique you used when applying the existing texture. There are some few common techniques for application.
For instance, you may use a roller to spread your dilute joint compound so as to copy a certain eggshell texture, then spray the dilute joint compound from your hand sprayer to produce a striking popcorn pattern. Spray a little dilute mud in blotches, and then flatten the botches. When flattening the botches, you can scrap them slightly using a drywall knife to produce a knockdown, which is apparently one of the most commonly known textures.